View Options
Screen Resolution Problems
If the computer has a high-definition resolution or ultra-high-definition resolution, QT creator and QGIS may need an adjustment so all windows can be loaded correctly.
For QT Creator Windows
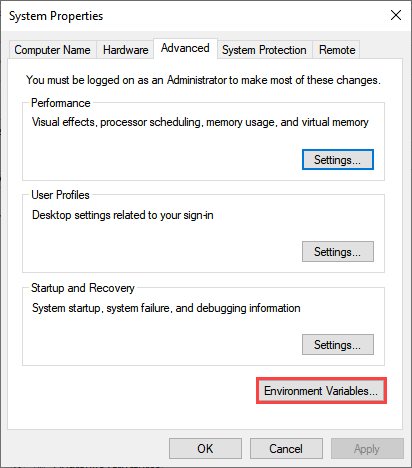
If the data in Widgets and Dialog Boxes is squeezed or not readable, set the Environmental Variables for QT Creator scaling factor, on the Advanced tab of the System Properties window, following the figures shown below. Set the Environmental Variables for the System not the user.
Open Control Panel and search for System Properties. Click the Environmental Variables button.
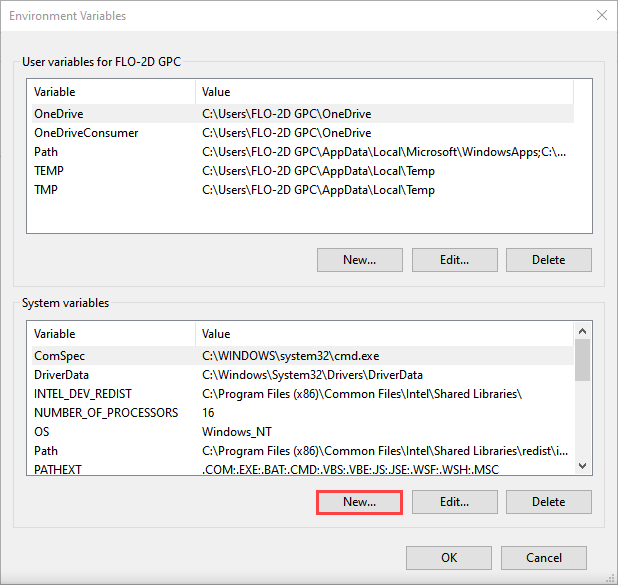
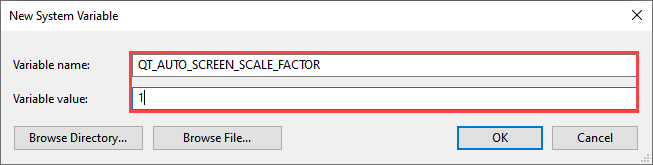
Click the New button for System Variables. Add the new variable as shown below.
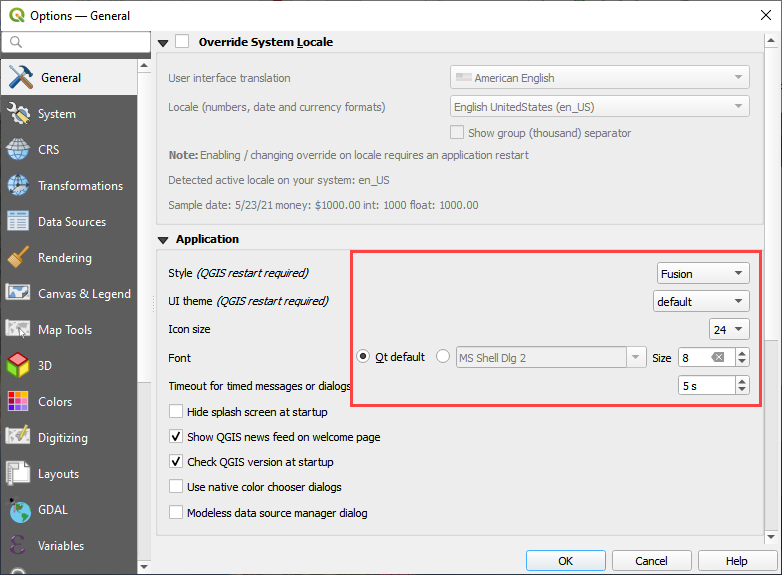
For QGIS, navigate to Settings > Options > General and set the icon size to 24 and the text size to 8. Try a few different combinations to optimize the display.
If any parts of the Plugin are missing, they can be retrieved using the View menu or by right clicking the Toolbar area.
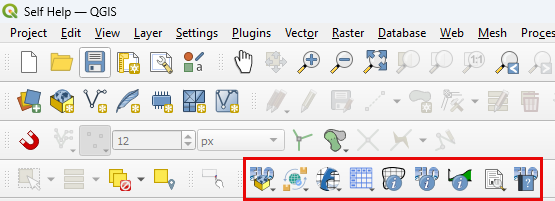
Plugin Toolbar
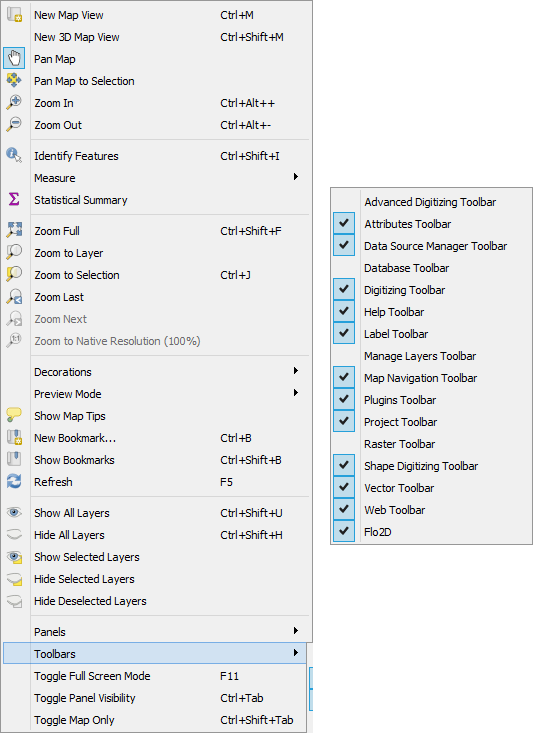
The FLO-2D Plugin toolbar is located on the QGIS toolbar lower tier. If the toolbar is missing, follow the FLO-2D Plugin installation instructions or use the View menu to load it onto the QGIS Toolbar menu.
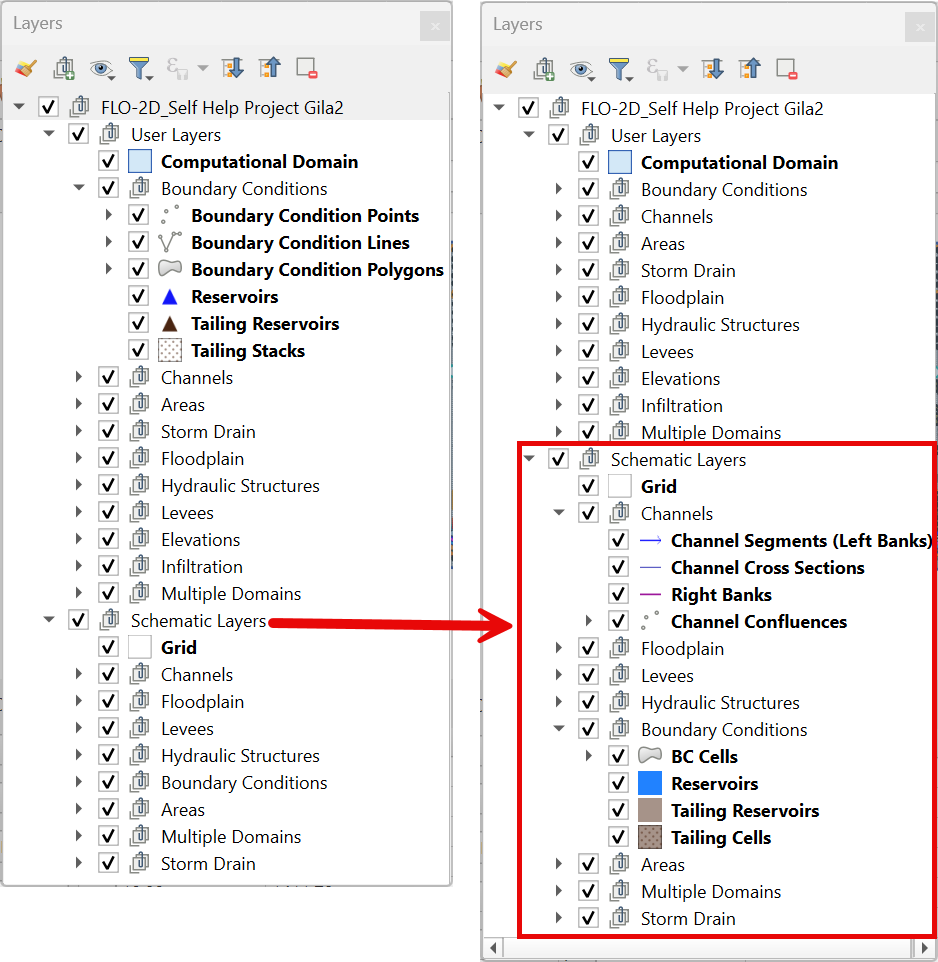
Plugin Layers
The FLO-2D Layers are loaded into the QGIS program when the user creates a GeoPackage. These layers are grouped into categories such as User Layers that can be edited and Schematic Layers that are written when data is schematized. There are also Storm Drain Layers, Infiltration Layers, Data Tables, and Channel Layers. All the data is stored as SQLite data in a GeoPackage file.
If the Layers Panel is missing, use the View Menu to display it. This window can be docked or un-docked by clicking and dragging the title area. In the following images, the Layers and Browser panel were docked together by dragging one panel onto the other.
Close the Browser panel or dock both Layers and Browser together so layers can be easily viewed.
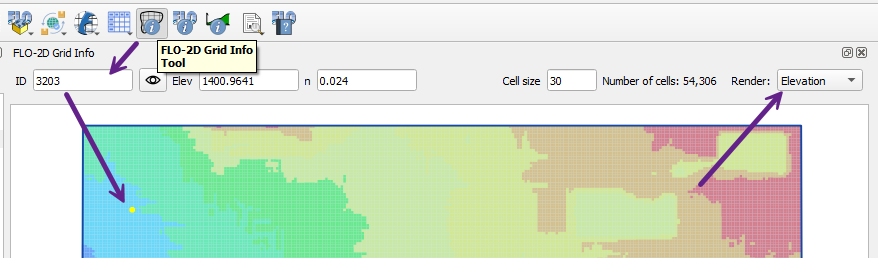
FLO-2D Grid Info Panel

The FLO-2D Grid Info button is used with the FLO-2D Grid Info Panel.
Click the button and then click any grid element to fill the grid element information.
Enter a grid element number and click the Eye button. The map will zoom to that element and highlight it with yellow.
The render checkbox will change the style of the grid layer so that the grid elevation is visible.
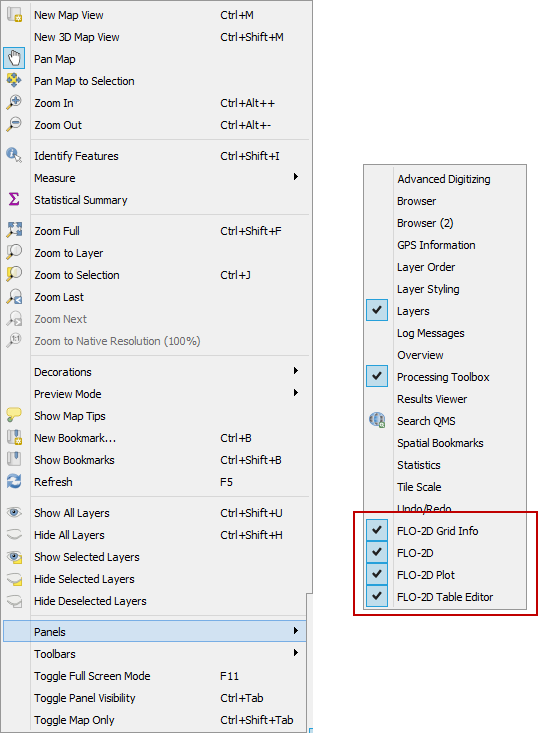
If the panel is missing, show it using the View>Panels>FLO-2D Grid Info Panel.
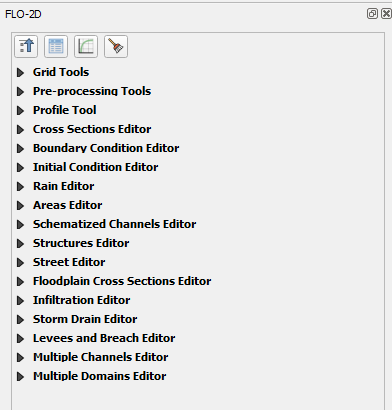
FLO-2D Widgets
The editor widget is used to digitize the User Layers. If the windows are missing, show them using the View>Panels>FLO-2D Panel.
The FLO-2D Widgets panel has some simple control buttons. The Clear rubberband button will clear the red marker used to show the selected feature. If a red rubberband is visible, the user can click the Clear button to remove it.
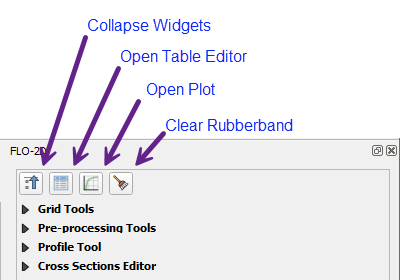
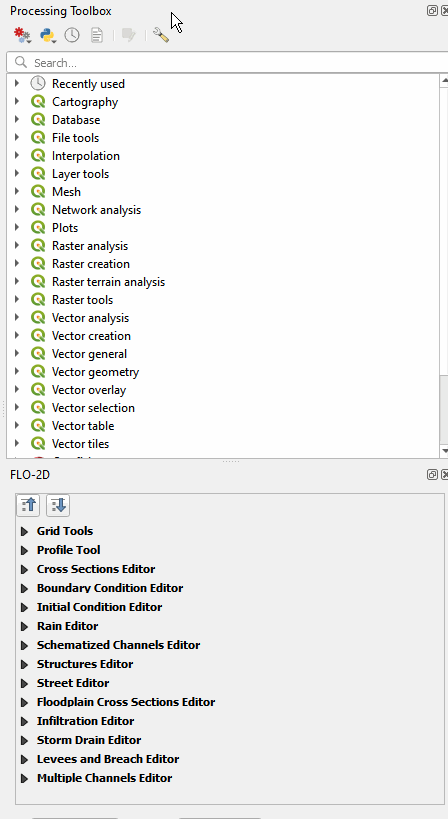
The Widget Panel can be docked with the QGIS Processing Tools Panel.
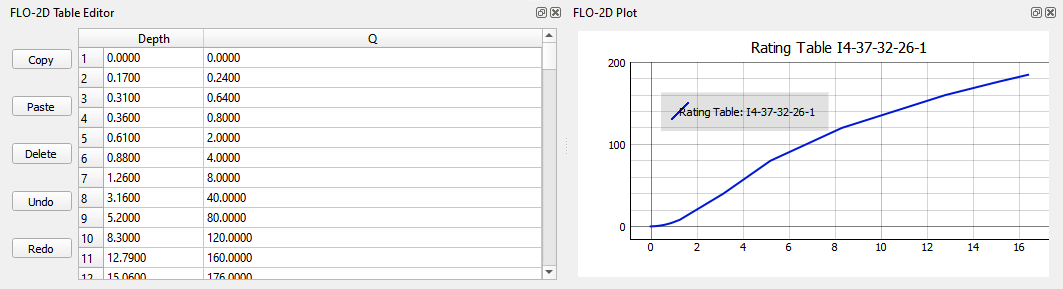
FLO-2D Plot and Table Editor Windows
The plot window and table editor window are used to assign table data to various components such as inflow, rain, hydraulic structures, and channels.
The user can copy and paste from excel or ASCII text files.
If these windows are missing, they can be restored quickly by clicking the open table and plot buttons on the FLO-2D Widget.
